Lastly, a friend of mine asked me about github so, apart from writing him back, I´ve decided to prepare a short blog post with a very basic introduction to github and RStudio. I hope someone finds it useful. It is not a manual “how to use git and RStudio” - there is a very good and comprehensive book on this topic by Jenny Bryan (which I highly recommend!). This post is as short as it can be, assuming that:
- you use RStudio,
- you have only a very general idea how git (and github) works,
- you want to start to work with git but you are afraid that something can go wrong,
- first of all, you want to share your code and having a version control is just an extra asset (at the moment).
The approach here is the following:
- create a repository on github
- clone it to your desktop
- add all the code you want to your repository (locally)
- commit (save) changes and push them to the github.
OK. Let's do it.
First - you need to create a github account. Go to https://github.com/ and click Sign up. Fill in all required fields and create an account.
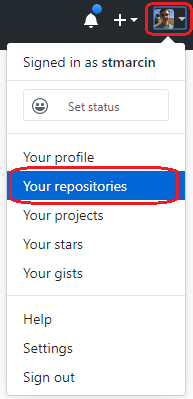
Then, sign in and press your avatar´s icon (on the top-right of the page). Select Your repositories.
Once you see the list of Your repositories (probably empty for the moment), you should click New in order to create a new repo:

Now, you need to name your repo (here: test-repo) and you are free to add a brief description. Still not sure about the result and prefer to keep it private until you confirm everything is correct? No problem, you can opt for a private repository. You will make it public, simply by changing the option in the settings of your repo. Would you like someone to check your code (and/or repo) before it goes public? No problem either - you can add collaborators, even if you are using a GitHub Free version (in that case, you can add up to 3 collaborators in private repos).
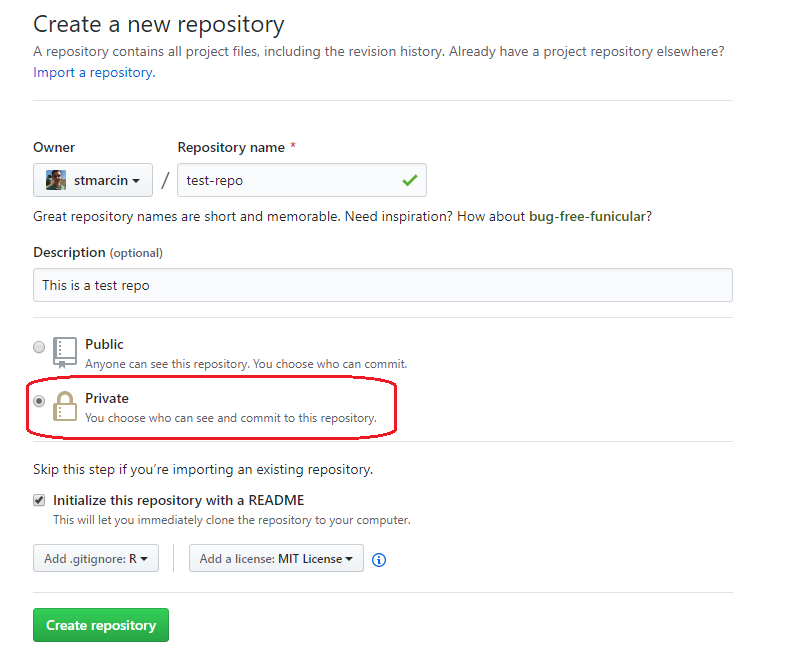
Then, opt for Initialize this repository with a README (a README file is the one everyone sees when viewing your repo). I suggest also to add a .gitignore (select R from a drop-down menu). A .gitignore file contains a list of the files which will be ignored by the git, which means they will not be committed (saved) nor push to the remote repository, so they will not be stored on github. Finally, you can select a licence under which your code will be distributed.
Choose Create a repository.
Your repository is now alive and you can revise it.
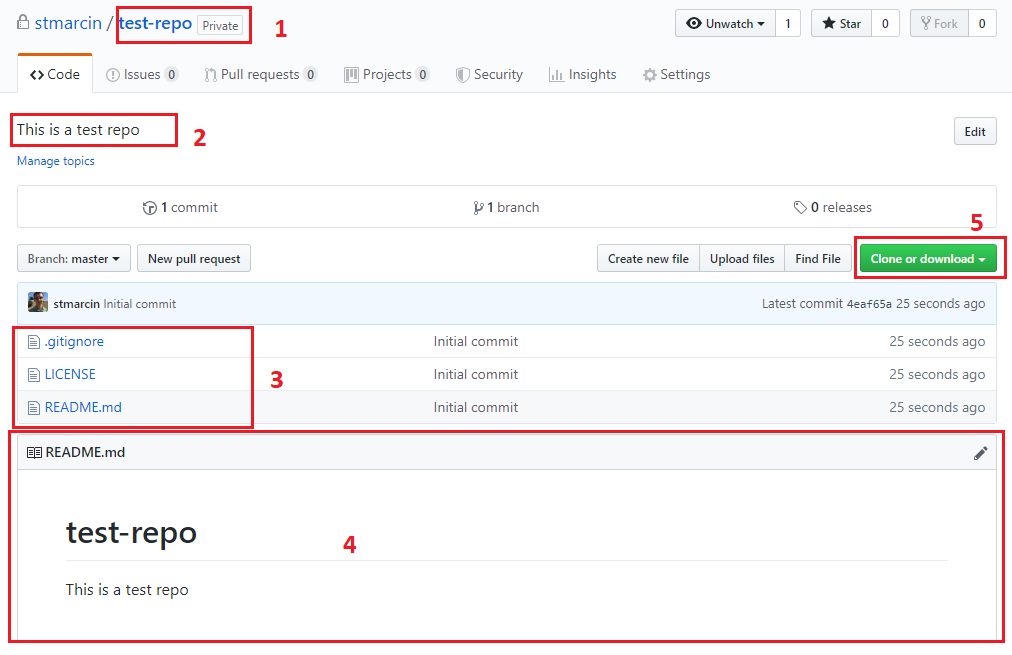
This is the name of your repository. You can see that the repository is private (so no one can see it).
A brief description of your repository (the one you provided with in the previous step).
A list of the files in your repository. At the moment there are only the ones created automatically by github.
A content of the
README.mdfile. This is a place where you will provide with a description of your code/repository.
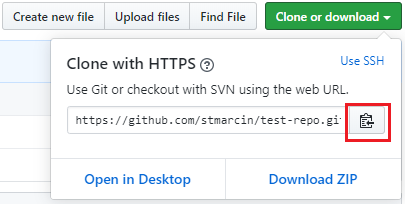
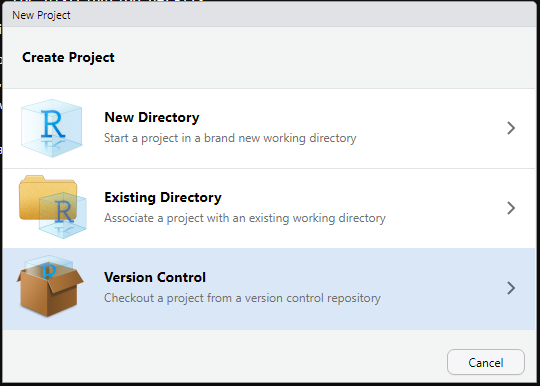
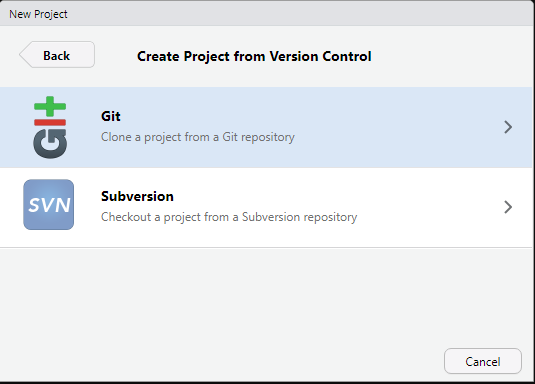
Now you need to create a new project in RStudio. In RStudio, go to File -> New Project and select Version Control. Then select Git.
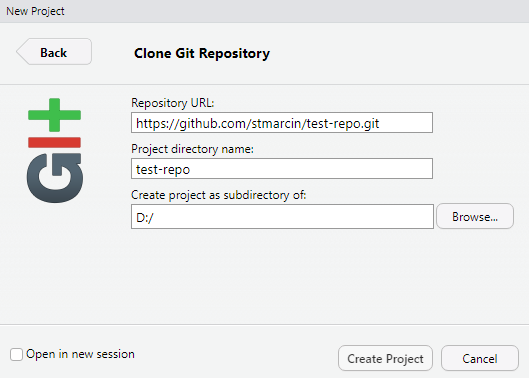
Paste a repository URL and navigate to the folder you would like to locate your repo. RStudio will create a subfolder for you, using the name of your repo as a name of a new subfolder.
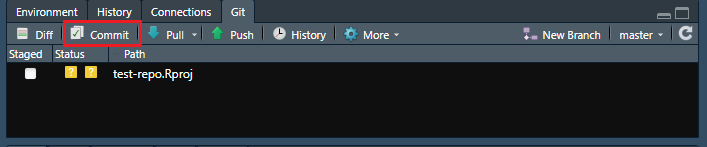
There is only one file - a .Rproj file. Before you place your code in the folder you have just created, I suggest you to add the .Rproj file to .gitignore. You need to open .gitignore and then type name-of-your-repo.Rproj at the end of the .gitignore file (in my case it would be test-repo.Rproj). Save a .gitignore file, and a .Rproj file disappears from your Git window, replaced by .gitignore.
Let’s use the .gitignore file to test a commit - a function which save changes in your repo. Click Commit button. You will be moved to a new window. In the box at the bottom, you can check what changes have been made in your file (see below: 1). In my case, I have added three new lines:
37 (empty line)
38 (comment # my files)
39 (addedtest-repo.Rprojso it will be ignored by git)
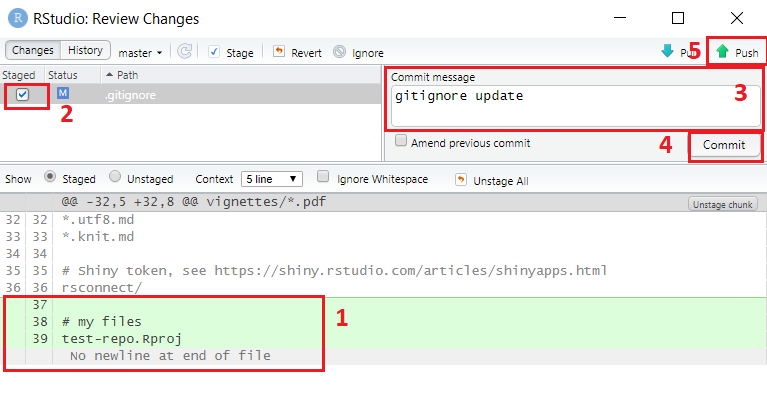
You need to mark (2) the file you want to commit (i.e. save changes in your repository - in the example it is .gitignore), and add a short Commit message (it will serve also as a name of your version; should be short but meaningful). Everything is ready for the Commit, so click the button (4)! You should get an info about your update saying:
[master some-numbers-and-letters-here] gitignore update
1 file changed, 3 insertions(+)
The second line reports details of your update (1 changed file with 3 new lines).
All changes are made locally. What you need now, is to push your local changes to the remote repository (i.e. to github). Click Push button (5). If everything works, you get an output similar to the one below (the first line is an URL of your remote repository):
To https://github.com/stmarcin/test-repo.git
some-numbers-and-letters-here..some-numbers-and-letters-here HEAD -> master
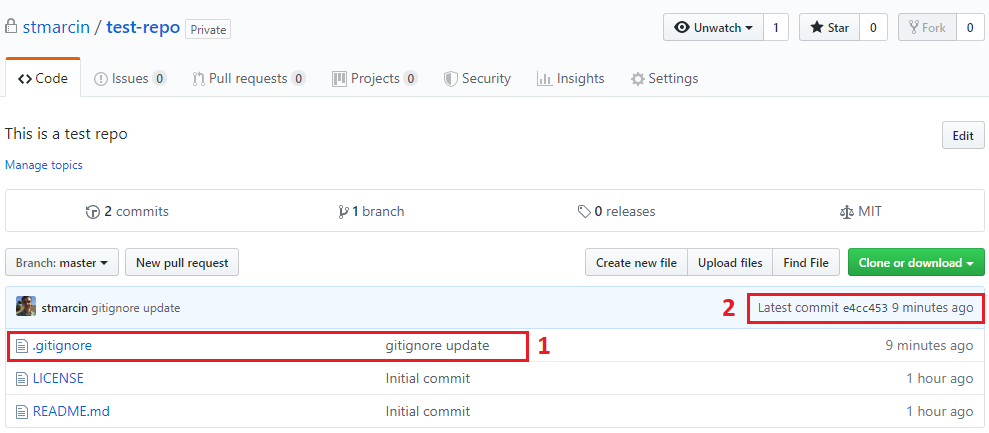
Done! Go to your github account (or refresh your web-browser) and you should see your commit message (1) and info about your latest commit (2). If you click a commit message (here: gitignore update) you can see all changes you have made!
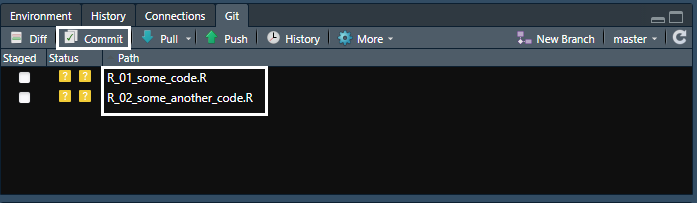
The last passage consists of the following steps:
- Add files to the RStudio project folder (I have added two of them:
R_01_some_code.RandR_02_some_another_code.R). They appear in a Git pane. - Click Commit button.
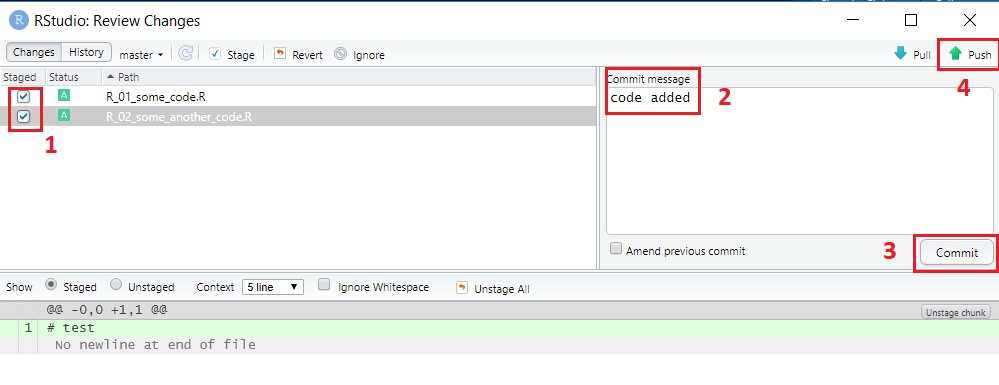
- Select all files (stage them; 1)
- Add a Commit message (2)
- Commit changes (3)
- Push changes to the remote repository (4).
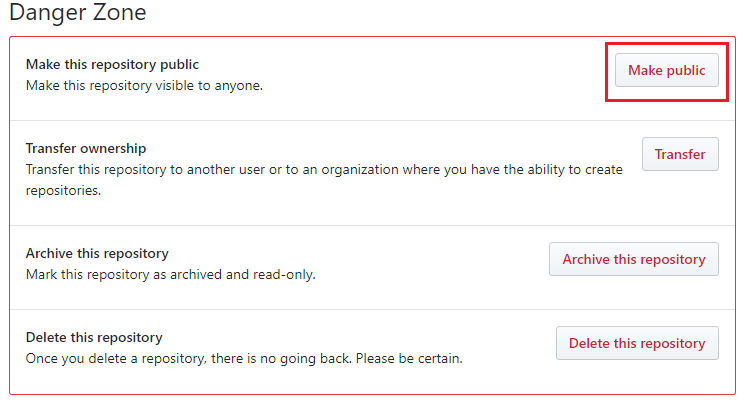
Now you can/should edit a README.md file, providing all necessary information about your code. Once it is done, you can make your repo public. Click Settings of your repo, scroll down to the Danger Zone and select Make public.

Congratulations! Your code is now on GitHub.
Instead of conclusions, I have an extra point: if you want your repository to get a DOI number (e.g. in order to make your code citable) you can find useful this manual: https://guides.github.com/activities/citable-code/.